Thursday, December 29, 2011

New Year's Chocolate Favors


HAPPY NEW YEAR!

Can you believe another year has gone by?  Boy it goes so fast.  I hope all of you had a wonderful and magical holiday season.

I have one last tutorial for you for this year. I realize I am probably posting too late for you to get the supplies and make these this year, but hopefully you will tuck this idea away  in your files for next year.


Let's make these adorable chocolate party favors. They stand about 5.5 inches tall.


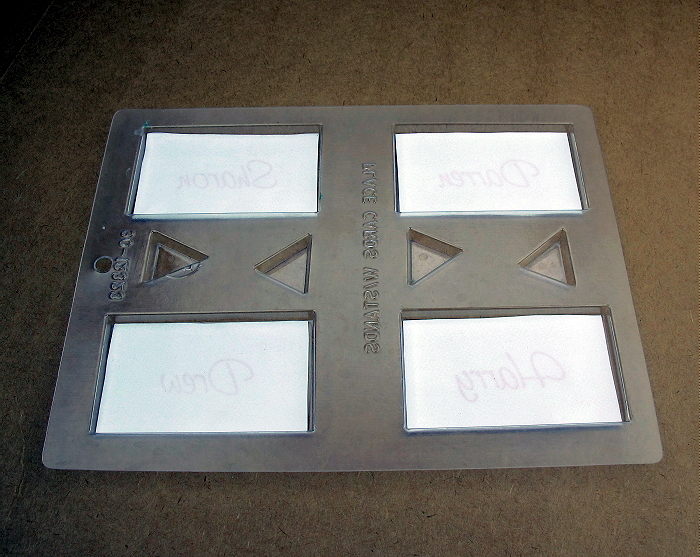
Gently melt the super white candy melts and tint it gray with oil based candy colors. Then fill both halves of the ice bucket mold. Pop them in the freezer for  about 10-12 minutes until they easily release from the mold.


Here are the two sides.


You can see by  looking at the half on the left that the mold has the chocolate coming up above the surface of the bucket. We have to carve some of that out with an exacto knife so that the bottle and ice can sit down in the bucket. You can see this was done on the half on the right.


Here are the two sides standing up for another angle showing how the halves need to be carved out.


Glue the two sides together with melted chocolate and smooth all the seems and imperfections with a knife and super clean (or gloved) fingers.


Now we break out the magic stuff. Silver luster dust dry dusted on top of gray chocolate (or fondant or gumpaste) will have a very realistic silver metallic look.  (Make sure you buy an edible luster dust.)


Then melt and color more chocolate green. Mold and chill the bottle halves.


Pop them out when ready.


Again join the two halves and smooth them out.


Cut the bottle at the height you want it to stick out of the bucket, with a little slant on the bottom.


Spray the bottle with about 3 coats (drying in between) of edible lacquer to give it some subtle shine.


Edible icing sheets are used to make the labels, and candy foil to cover the stopper.


Glue the bottle in the bucket with more chocolate, and add rock candy  for ice.


A photo for size reference.


These would make great table decorations. They would also be fabulous party favors if boxed in clear plastic boxes.


 HERE IS TO 2012!


All of us here at SugarEd Productions wish you  a prosperous and healthy year; filled with love and laughter and success. We sincerely thank you for your patronage, and look forward to serving  you in 2012.

Happy caking!
Sharon

Monday, December 19, 2011

Edible Holiday Place Cards


It's The Most Wonderful Time of the Year!


Don't you just love the holiday season? I sure do. I especially love all the festivities and get togethers with loved ones. I am planning an intimate dinner party this weekend with just my closest of friends. I hate those big ole stuffy parties where it is so crowded and loud you can't even talk to anyone, don't you? I prefer a much more intimate setting. That is why I am doing a sit down holiday dinner. I have invited 6 of my closet friends. I cannot wait!


I have made these beautiful edible placards to put on the table. I just hate it when everyone fights over who is going to sit next to me. So awkward. These should solve that problem!


Let me show you how to make them, they are easy!
(You can click on the photos to make them larger.)


Print the names in the size and font you want on edible icing sheets. I like Kopykake brand. (You have to use an edible ink printer to make these food safe.)


Cut them out and lay them face down into the place card chocolate mold.


   Pour melted white chocolate into the card molds and the little stands too.


About 8-10 minutes in the freezer and then they will fall right out of the mold. Now the edible image is embedded into the chocolate and it looks seamless and like all one piece! Love that.


To decorate these, I piped royal icing bead borders with a tip7. Let that dry a good bit and then paint them with  gold luster dust mixed with vodka. Let that fully dry. Then add a red clay gun string ( the smallest round disc)  as  a decorative border inside the gold piping.


Attach the stand to the back with chocolate.


I also used these premade royal icing decorations that I purchased here.


Isn't  that just beautiful? I think Martha will be a little jealous of my mad crafty skillz. :)


Your guests will be awed by the fact that these are edible, and even more so by the fact  that you made them.


I also made another design for my New Orleans pals.  Many of you know that I am a devoted native of New Orleans, and  just adore our culture and history.   I wanted to make something special for my local buds.


For these, I used my strip cutters to frame the cards with red and green fondant.


I used my fleur de lis push mold and white fondant to make the decorations. I painted them gold after they were dry, then attached them to the cards.


Lovely.  I think Drew will be impressed. Yes, Drew and I are close personal friends. (He just doesn't know it yet.)


Darren (Sproles) and  Harry (Connick) will shower me with compliments.


What? You don't believe that I know Harry?
Let me prove it to you then:

 
 Right after this photo was taken he proposed. But I had to say no because I am already married.


Back to the place cards:


I think the fleur de lis is especially fitting for Drew.


Darren also, since they both play for the Saints. Who Dat!


Harry loves his coffee and dessert.


I cannot wait for my party!  
I hope Oprah does not drink too much and hit on Donald like last year.


I hope you guys give these a try; they are really fun and easy to make.

And be sure to join us on Facebook for our related Give-away!


Happy Holidays Everyone!

Sharon
www.sugaredproductions.com


Friday, December 16, 2011

Ruffled Christmas Tree cake


 Oh Christmas Tree!

Oh, I used that intro last time.
My bad.

Wanna see how to make this ridiculously raucous ruffled rarity?


Let me show you my inspiration. I saw this photo of a shirt on Pinterest and it screamed cake to me. (Sorry I do not know the owner of this photo.)
"MAKE ME INTO A CAKE!"


Ok, stop yelling at me. I will!


I wanted to make it a little bit more fun by coloring the batter. How did I do it you ask? Just make two batches of batter and color them with your gel or paste colors. Then just plop blobs of the batter into the pan alternately and randomly. Do not spread it out with a spatula, nor stir or swirl it. That will make the colors mix and give you black cake. Ask me how I know. :) .... Bake as usual.


Then I carved a basic triangular tree shape from the cake and used a leftover piece for the trunk. I decided after the first cuts that the tree was too thin, so I added small strips on each side to make it fatter. You can see the icing seems where I glued those pieces together.


Crumb coated.


Covered in fondant. You can surely use buttercream if you like.


Now it is time to make the ruffles. Cut a long strip of fondant.


 Use white fondant to cut circles for your polka dots.


Attach the fondant to the cake. Just pinch and  press the top edge of the fondant ruffle as you go along the width of the cake. Use shortening as your glue and you will love me forever. Trust me on this. No mess. No drippies. No smears. No cuss words. :)

I put the polka dots on after the green ruffle was on the cake. It was much easier to do it that way, rather than trying to do it before. Trust me again. I tried it both ways. First way involved some cuss words. :)


Red strip of fondant with thinner white strips.


Attach the stripes before you put the ruffle on the cake. Trust me on this too. I tried  to add them after the ruffle was applied, and it involved some cuss words. :)


Pinch and ruffle as you go along. Use paper towel scraps to prop up your ruffles or they will just droop down flat.


This green ruffle used the PME smocking roller. Don't even think about doing the impression after the ruffle is on the cake! :)


In place.


Another white ruffle with bigger red polka dots.


Diagonal white stripes on green ruffle.


Keep it on going all the way up the tree.


I finished mine with a bow on the top. Prop it up with paper towels until fully dry and firm.When everything is fully dry, take all the paper towels out. If you have dryness, cornstarch residue, or just want to refresh the look of the cake, we then do what?   I know you know! :)


Fondant clay gun squiggles and polka dots to dress up the board.


Cute, yes?

Let's see how the inside looks:


Fun, yes?


Kewl.


I love my little ruffly tree cake. I think the Tshirt would be proud.


What other color combinations do you think would be cute for this cake?


I hope you like it and try it!

Happy Caking!
Sharon