Like any good native New Orleanean right now, my mind is obsessed with the Saints' road to Superbowl 2012. Two more games! Will we do it? Nerves and excitement and anticipation.....
So the other day I am driving back from the dentist , about a 50 minute ride in the car. Of course I am thinking abut my beloved Who Dat Boyz. But I also realize that it is time for me to post another item on the blog. What shall I do? Then I go back to thinking about the playoff game this coming Saturday, and the fact that I need to bring a dessert to my sister's house for the viewing party. What shall I bring? Hmmmm.... the kids love cupcakes and they are easy to make. But I have to make them cute and football themed. What shall I do, what shall I do?
As I am driving along consumed with thoughts of cupcakes and football (and probably not paying nearly enough attention to driving).... it hit me! It just came to me, and with it that adrenalin rush of excitement you get when a creative idea pops into your head. The more I think about it, the more excited I am getting. As I continue to hash out and develop the idea in my mind, I find my heart starting to race a bit and my tummy having a few butterflies. Oh I am SO excited! This is going to be great! You guys know that feeling..... you get the light bulb moment and then you just can't wait to get started and see if it will turn out like you hope.
I found myself driving faster and faster to get home so I could get started. Passing folks who are going too slow for me. Blowing the horn at that little old lady who who sat at the red light one fraction of a second too long once it turned green. ( And I am usually a very patient and considerate driver.)
A little faster still. Heck on the passing lane! I am passing folks on the shoulder! At 80 miles an hour! Kicking up a trail of dust and gravel. Running red lights and stop signs. I have to get home!
Then it happened. Yep, the copper. Got pulled over for my so called "erratic driving". Officer Bully came up to my window and peered over his out of style metal rimmed sunglasses. He did not look pleased as he pulled his fat ticket book out of his back pocket and flipped the top over, starting to write. As he scribbled all my essential information, I excitedly explained about my idea, and that I needed to hurry up and get home to get started before I lost my inspiration. (Or forgot my idea, which is a problem at my age.) He listened intently and when I finished he said, "You are making Saints themed cupcakes for the game this weekend? WHO DAT!" And not only did I not get a ticket, he gave me a lights and sirens escort all the way to my house. We sped down Highway 59 topping speeds of 95 MPH. We got so air born going over speed bumps that I felt like that orange car in the Dukes Of Hazzard. As I peeled into my driveway on two wheels, I waved off Officer Friendly , screeched the car to a halt, and ran inside to my desk to start my project.
*
*
*
*
*
*
OK, none of that really happened. But wasn't that more exciting to read than "I drove home from the dentist and started to work on my cupcakes." ?? (grin)
--------------------------------------------------------------------
So my idea was to try to make my own custom cupcake wrappers. There are not any cute football or Saints ones out there, so I figured I could do it on my computer.
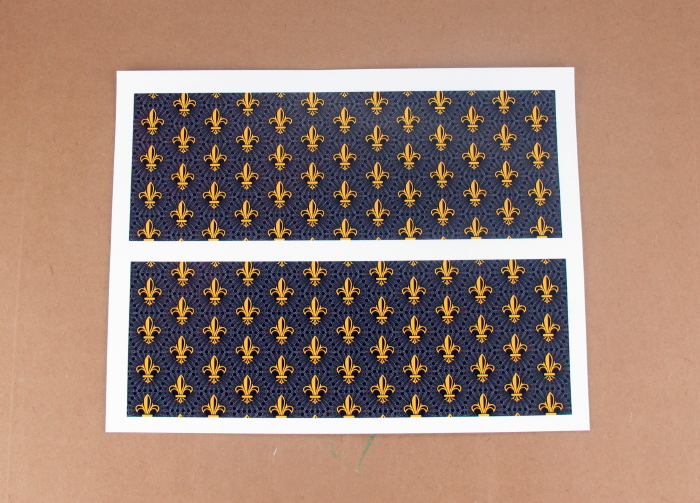
I started with buying this piece of clip art, which only cost a few dollars:
I use my favorite graphics arts program, Print Shop, but you can use any printing program you like. I imported the clip art into the program, and printed it out on photo paper. I used photo paper because I wanted the gloss, but you could also use card stock paper.
Here it is printed out with two strips, for two cupcakes.
For this one I just created a large square of gold color in the program and placed the words layered on top and printed that out.
The last one I used a fun font and fleur de lis clip art to create this pattern. I took an extra cupcake wrapper I had on hand and traced that pattern onto the paper and cut it out. Then I attached the two ends of the wrapper with one single staple in the back.
I decided to use clip art on edible icing sheets to make one of the cupcake toppers. I printed the fleur de lis out using my edible ink printer. I added some powdered tylose to white fondant and rolled it to number 4 on my pasta roller. I dampened the fondant with a moist paper towel, and laid the cut out fleur de lis on top. I used a clean exacto knife to cut out the fondant using the fleur de lis as the guide. This sat overnight to get nice and firm.
I wanted to dress it up a little, so I piped a black royal icing outline around the fleur de lis and sprinkled edible glitter dust on. I wasn't really thrilled with the look of that, so on another one I outlined and then also brushed the entire surface of the fleur de lis with piping gel before sprinkling the dust on. That made a really cool sparkly silhouette. I like that one much better. Those have to dry fully as well before going in the icing.
A fun Who Dat cupcake!
I used push molds to make more fleur de lis from fondant with tylose added. Let those dry overnight and then painted with gold luster dust paint. The mold on the far left was homemade, but the white one can be
found here, and the multi one is
right here.
I love the big gold one on top.
I know we don't usually use black icing for obvious reasons, but I had to try one to see how it looked. If you have anyone at your party pulling for the other team, they get that one. :)
I did both scalloped and straight cut papers.
I like this elegant one a lot.
And I also discovered the special effects in my photo editing program!
Focal color:
Soft focus:
Black and white with a hit of color:
Sepia:
Warmified:
Soft focus again. Ok, I got a little carried away.....
Regular!
Notes:
1) These papers are not food safe, so make sure the icing and cake do not touch them.
2) Let the ink dry a while before you cut them to avoid smearing with your fingers
3) Be sure not to use copyrighted logos on items for sale.
$) If your dumb cupcakes do not bake up high enough, bump them up by placing an Oreo cookie under them inside the wrapper. :)
These were really fun to make, and easy! And fast! The possibilities are infinite when you make your own wrappers. I really hope you try it.
Now, I must go iron my Saints jersey for the big game Saturday!
GO SAINTS!
Sharon